![]()
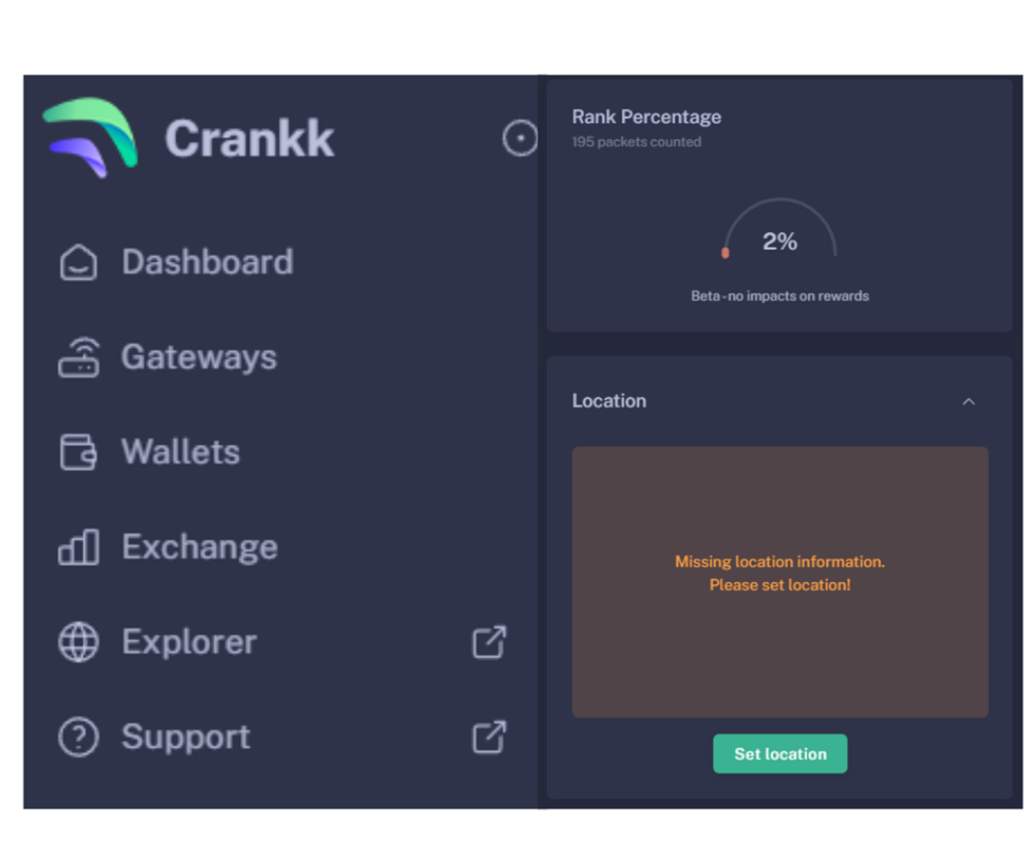
Crankk official guide for onboarding a Controllino gateway
We have to mention that onboarding a Controllino gateway in Crankk is not the easiest process.
We’ll break this process down into smaller, manageable steps to make it hassle-free for you.
However once you’ve got the SD card in your hands, the rest is a piece of cake!
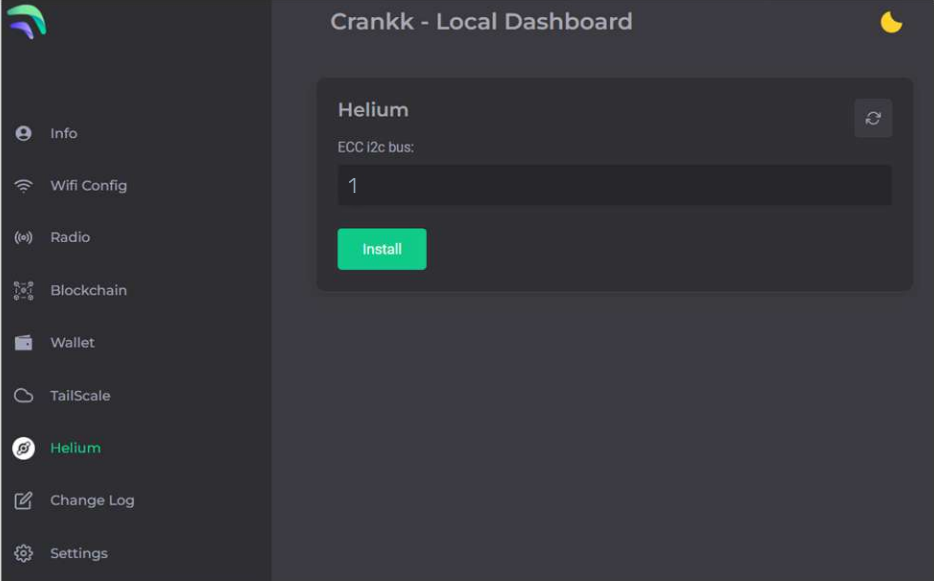
If you’re considering dual mining Helium, please remember that you need to onboard it with Helium first.
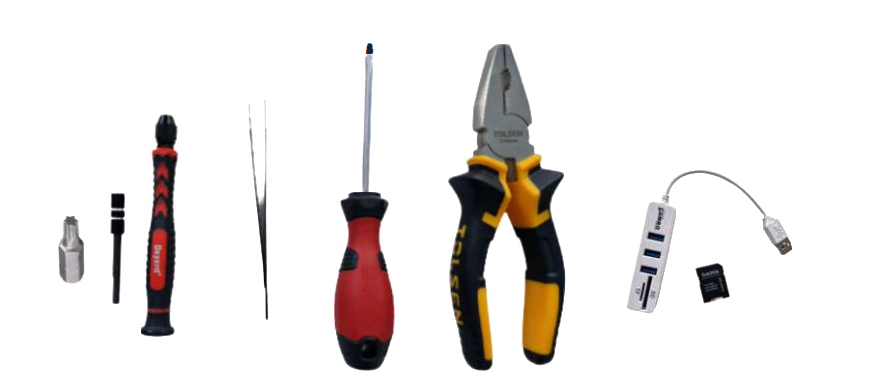
Here are a few things you might need for this guide: a T15 Torx, a 5mm Hex Female bit, tweezers, a screwdriver, pliers and
an SD card reader/adapter:
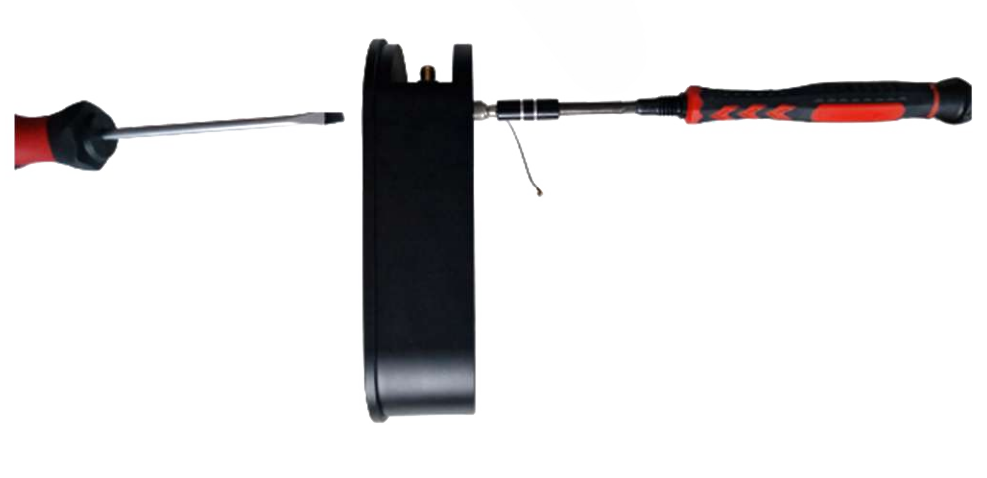
1. Remove the top lid.
Take off the top lid using the T15 Torx. To maintain better balance and stability, you may want to hold the opposite side of the lid with a screwdriver .
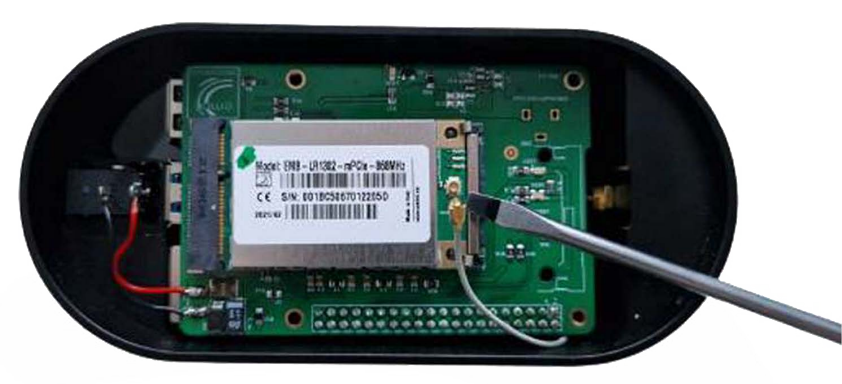
2. Open the top cover and remove the antenna connector from the LoRa module.
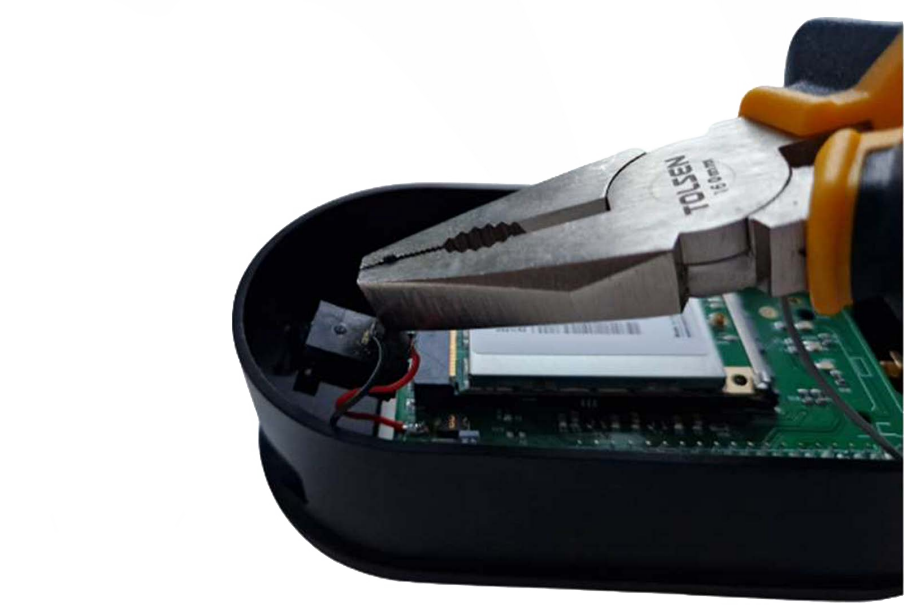
3. Remove the power connector from its socket.
This is an easy task, as the connector is loose. If you use pliers to do this, be careful not to damage the connector cables.
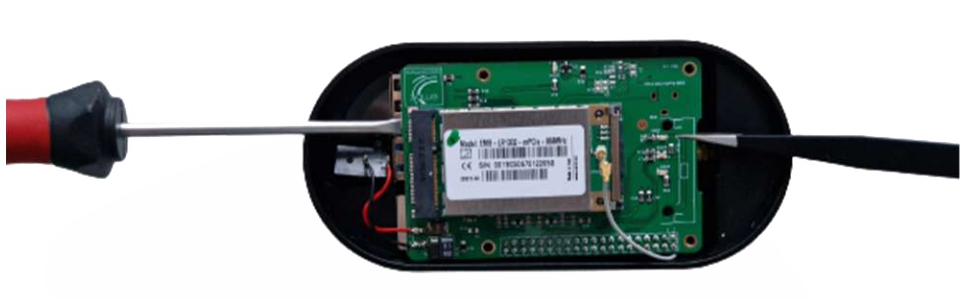
4. Take off the whole board.
Please do not remove the LoRa module attached to it.
To flip the board, use a screwdriver for one side and tweezers for the other.
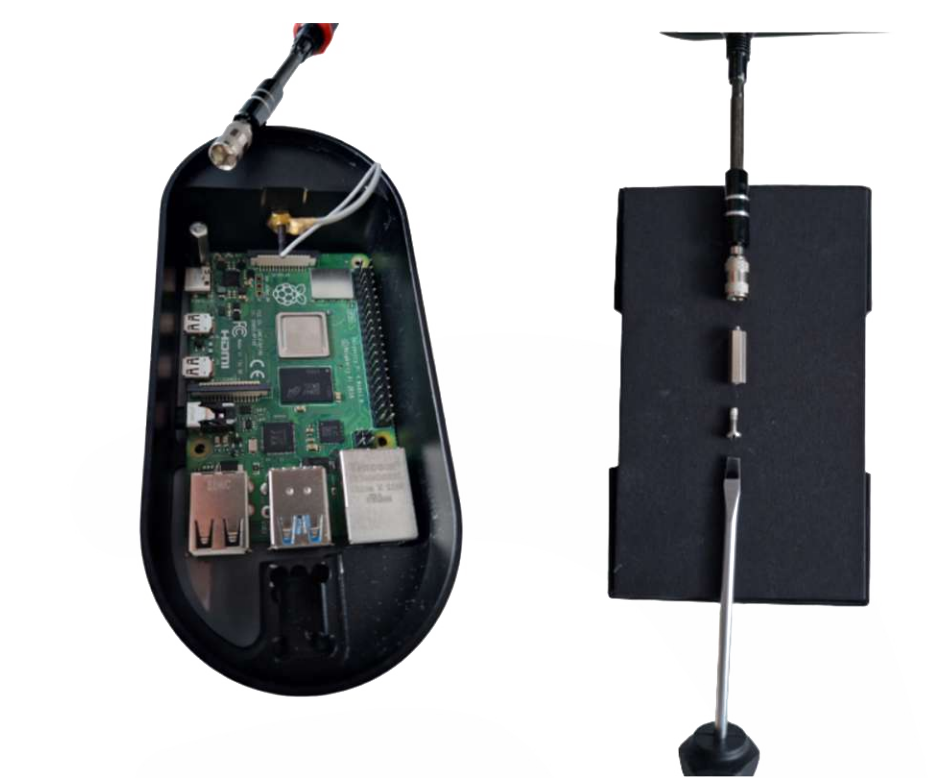
A sneak peek to the Raspberry Pi module:
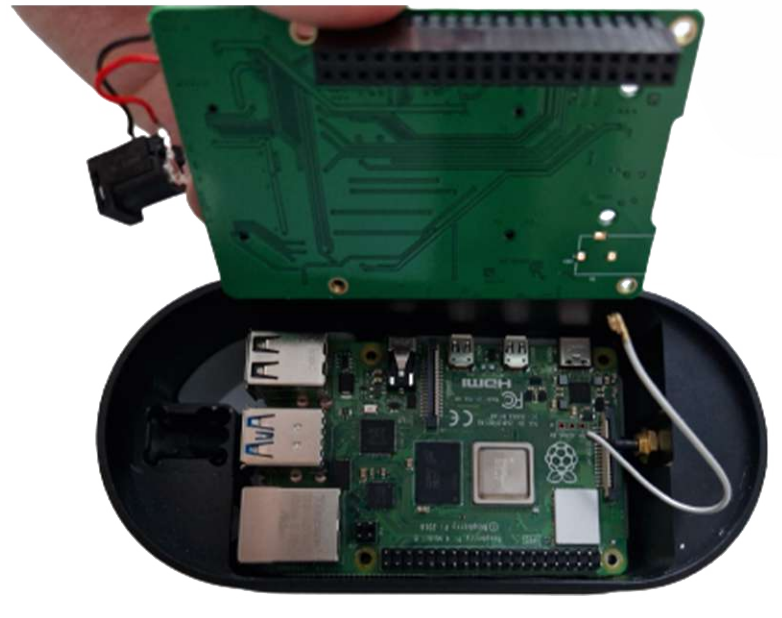
5. Detach the SMA connector.
This step is optional. If you decide to skip it, please be careful not to damage the cables while pulling out the Raspberry Pi board.
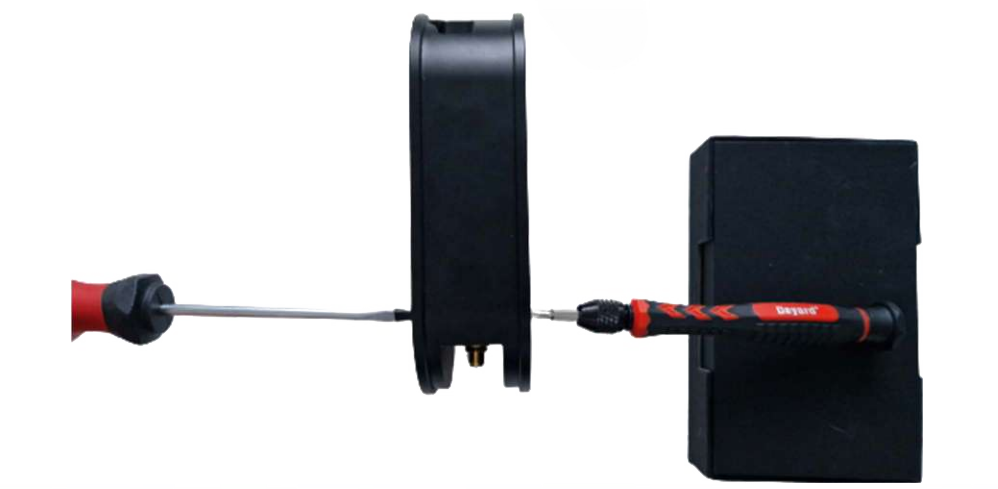
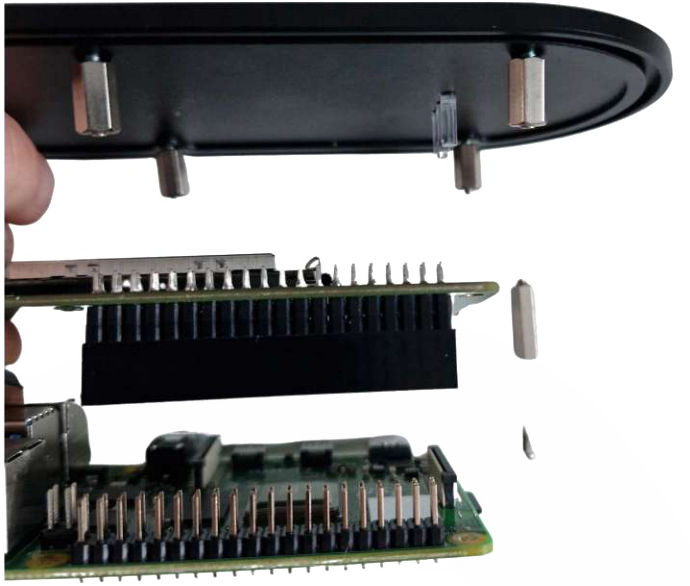
6. Take out the bolts located on the back side of the Controllino gateway.
This is the hardest step, so please proceed carefully, as the bolts may be glued in place (thanks, Controllino!).
As shown in the image, start slowly unfastening the bolts from the outside with a slotted screwdriver while holding them with a hex screwdriver from the inside. If you are successful, that’s great.
However, if the bolts do not come out this way, it means they are glued and you will need to apply more pressure to break them apart. Start slowly unscrewing the bolts with the slotted screwdriver to the right while applying maximum pressure, then switch directions. After doing this a few times, the bolts should break.
7. Flash the SD card and put it back in place.
Take out the SD card and flash the Crankk image as shown in the next steps.
When you’re ready to insert the SD card back into the Controllino, be careful with the pins that connect the Raspberry Pi board to the board holding the LoRa module. Take a look from the side to ensure a perfect match.
You can copy the config file from your original SD card and use it, or you can choose to use your own card to flash the image. We recommend using at least a 64GB SD card.
8. Download the Crankk image and balenaEtcher.
Follow this link to download the official Crankk IMG.
And this one to download the balenaEtcher software, which is needed to flash the image to the SD card.
While you wait for the downloads to complete, head over to your Control lino gateway.
9. Remove the SD card from your Controllino gateway and insert it into an SD card reader/adapter on your PC.
To begin, gently remove the plastic tab and use tweezers to extract the SD card.
Next, insert the card into an SD card reader/adapter on your PC and you’re ready to get started.
A message Format Disk might appear on your screen. You don’t need to format the card, as the balenaEtcher will take care of it. You can copy the config file from the SD card and keep it as
a backup.
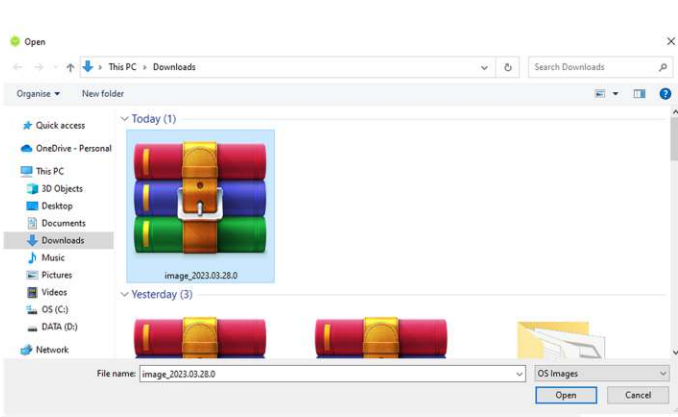
10. Install balenaEtcher and flash the SD card.

Use the Flash from file option and select the Crankk image file you have downloaded. You don’t need to unzip the file, just select it as is
Okay, next pick your SD card >Select> Flash
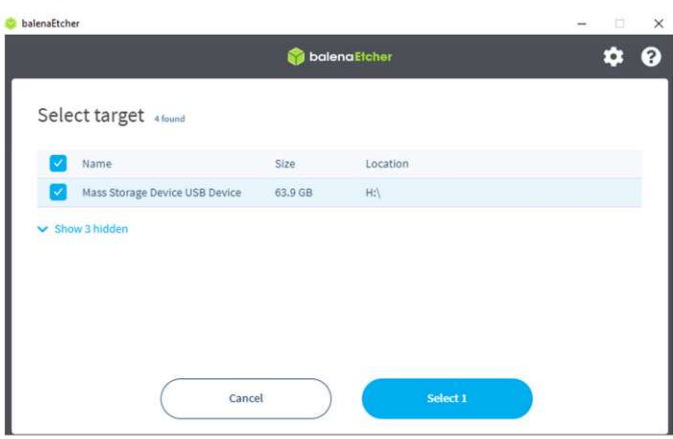
The flashing process can vary, but usually takes about 20-30 minutes.
11. Place the SD card back into the gateway.
Once the process is completed, insert the SD card back into your gateway and attach the antenna.
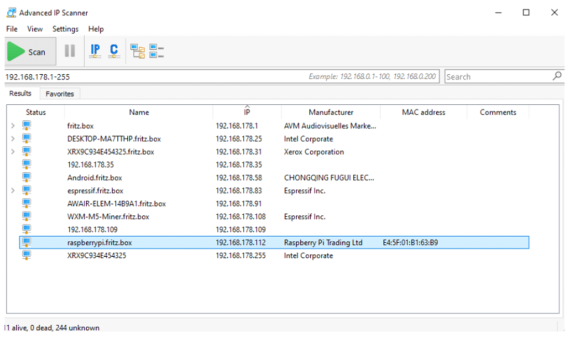
Then connect the gateway via an Ethernet LAN cable to your local network and power it on.
Please wait a few minutes for the gateway to boot up and then return to your PC.