![]()
Crankk official guide for onboarding a Bobcat Miner 300 G290/G295 gateway
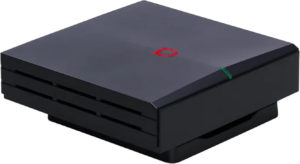
You can identify the 2GB Bobcat Miner 300 by examining the Serial Number located on its rear side. The Serial Number should start with either G290 or G295. Alternatively, you can open the box and verify if the chip inside has G290/G295 written on it.
Disclaimer: Advanced IT skills are a requirement before proceeding with the Bobcat Miner. Any issues resulting from non-compliance are solely your responsibility. Proceed at your own risk.
The onboarding process for the Bobcat will result in the deletion of the original stock Bobcat firmware. Crankk is not responsible for providing a backup.
If you’re considering dual mining Helium, please remember that you need to onboard it with Helium first.
Please take note of potential Bobcat design flaws and hardware challenges outlined at the bottom of the guide.
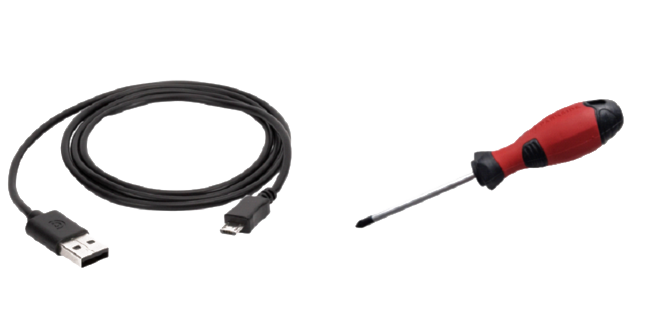
Here are a few things you might need for this guide: T9 bit screwdriver and micro-USB cable
In this guide, we will walk you through the process of flashing the CrankkOS image onto your 2GB Bobcat Miner 300 G29O/G295 using a Windows OS PC. Please note that
this guide is also applicable to Linux and macOS systems.
We will use ‘Bobcat Miner‘ to refer to the gateway.
3) Flash the CrankkOS image to the Bobcat’s eMMC
Please follow this link to download the
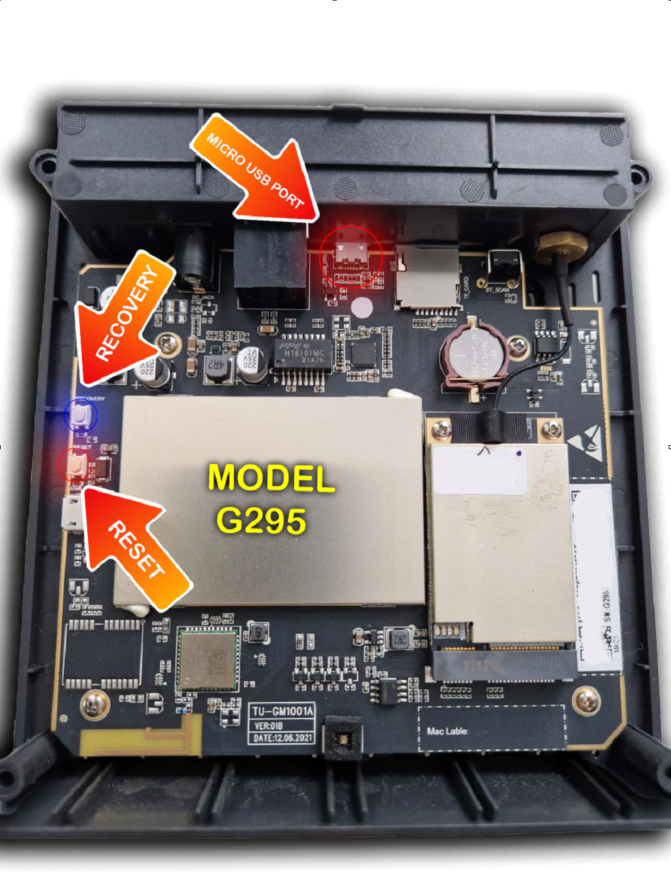
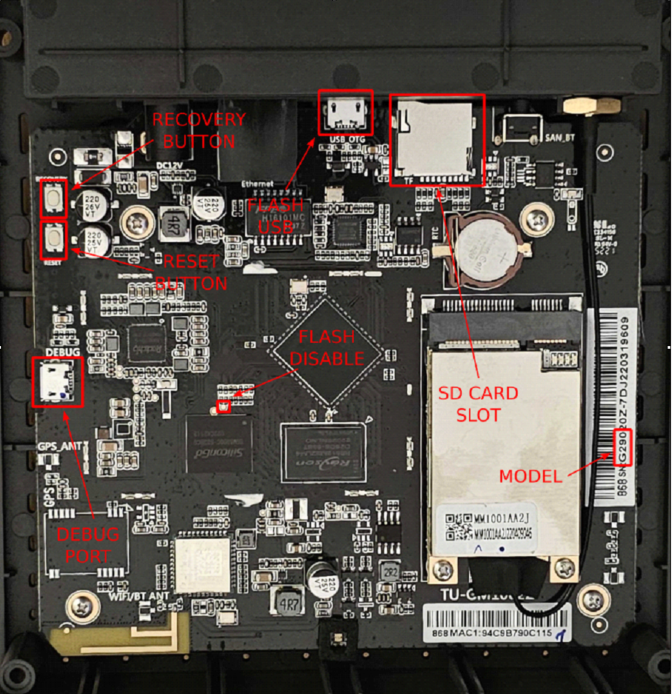
Use a micro-USB cable to connect the Bobcat to your PC. The Bobcat features two micro-USB connectors; use the one that’s accessible from the back panel, labeled USB_OTG on the PCB.
Subsequently, power the Bobcat Miner using its standard power adapter while it remains connected to the PC via the micro-USB cable.
3. Download and Install the Rockchip Flashing Tools.
Rockchip Flashing Tools are available for Windows/Linux/MAC OS.
For Windows users, download the latest recommended version of the tools. Follow the instructions provided to install the tools. Make sure to install RKDriverAssistant as the first step.
Then please restart your PC.
4. Open the Bobcat Miner.
Begin by removing the four bolts on the back of the Bobcat using a T9 bit screwdriver.
Take note of the locations of the two buttons on the left side of the board – Recovery(Purple) and Reset(Red).
Do NOT press anything yet, but we will need them for the next few steps.
5. Flash the unzipped CrankkOS image to the eMMC
Begin by downloading the bootloader from this LINK, its an essential component for the later stages of this guide.
Run RKDevTool.exe to start the flashing tools.
Our goal here is to erase the flash memory and then install the CrankkOS image.
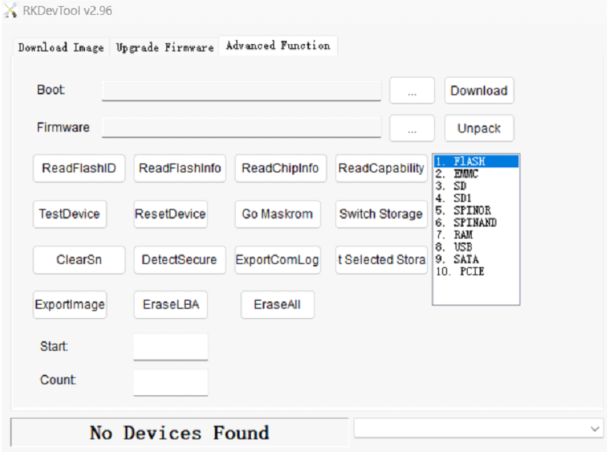
This is how it’s going to look the tool interface, before the procedure:
Unplug the Bobcat power cord and locate the Recovery button. (For G290 models, this button should be positioned similarly.)
Securely grip the Bobcat box to prevent any accidental slipping while pressing the button.
Press and hold the Recovery button, and then plug the power cord back in.
If the procedure is successful, you will receive a message indicating Found One Loader Device. If this message does not appear, change the micro USB cable with another one.
Additionally, the green light will turn off .
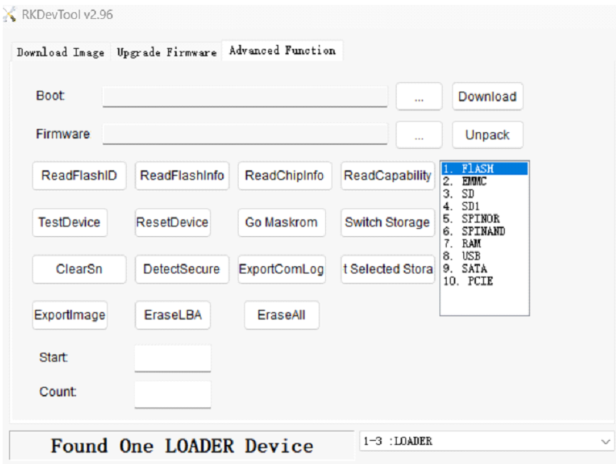
Navigate to Advanced Function and select Flash.
Click on EraseAII button and wait until its 100% completed.
To go into Maskrom Mode simply disconnect the Bobcat Miner from power and then reconnect it. Restart of your PC might be also needed. (check Troubleshooting options)
6. Flash the CrankkOS image
After the reboot is finalized, reopen RKDevTool.exe. (don’t worry that the blue light is off that’s normal)
Please note that this will erase all the previous information, stored on the Bobcat Miner.
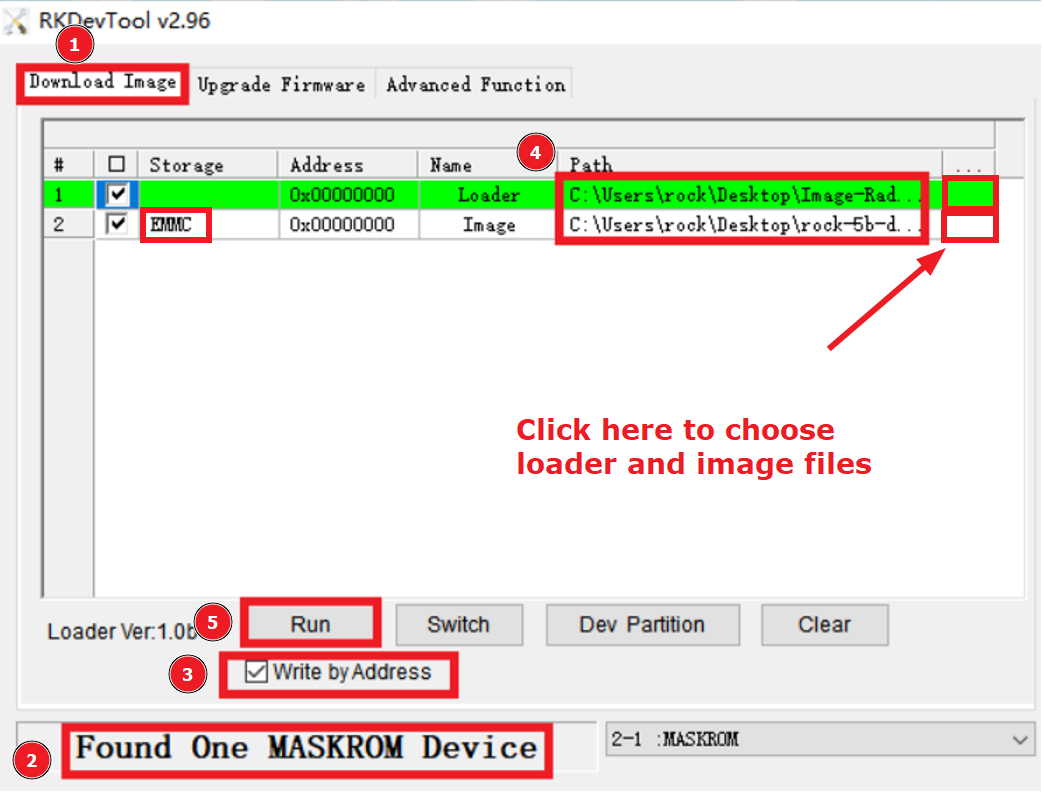
⦁ Select Download image tab.
⦁ Make sure you are in Maskrom mode.
⦁ Enable Write by Address.
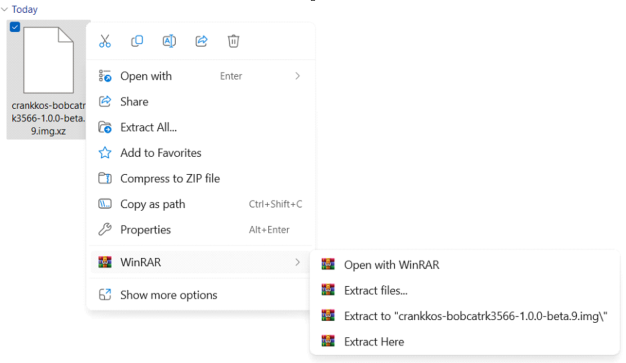
⦁ Choose the correct Loader and image files, by clicking on the boxes under the three dots. Please make sure you have selected the unzipped .img file.
⦁ Double-check all the settings, ensuring everything is in order. Make sure the EMMC is present in the line 2 in the Storage tab, as shown on the screenshot. Confirm that the Address is set to 0, and then press Run.
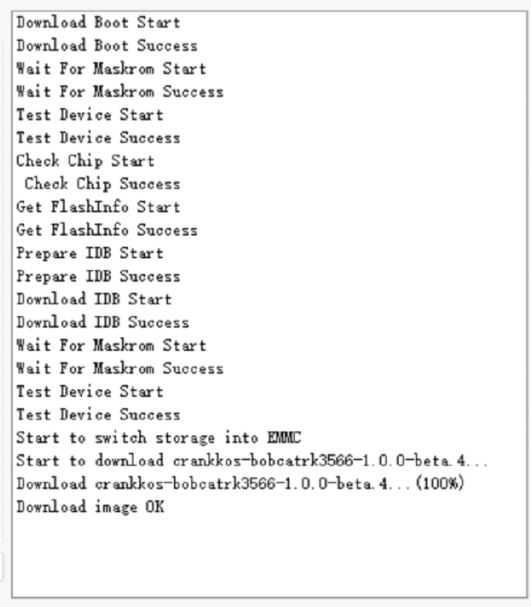
Upon completion of the flashing process, disconnect the micro USB cable and power adapter. Reassemble the gateway, attaching the antenna and LAN cable. Start the Bobcat Miner normally.
If, for any reason, the flashing procedure fails, you can begin again from Step 5.