![]()
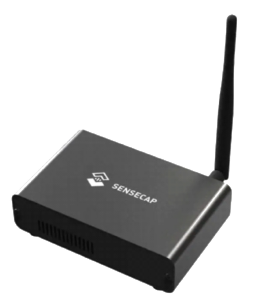
Crankk official guide for onboarding a SenseCAP M1 gateway via SSH
Onboarding a SenseCAP M1 gateway via SSH can take some time and require some technical skills, but don’t worry, we’re here to guide you through every step. So grab yourself a cup of coffee and let’s get started!
If you’re considering dual mining Helium, please remember that you need to onboard it with Helium first.
Here are a few things you might need for this guide: tweezers, a screwdriver and an SD card reader/adapter:

1. Remove the SD card from your SenseCAP M1 gateway and insert it into an SD card reader/adapter on your PC.
To begin, unscrew the bolts of your SenseCAP M1 gateway and remove the front lid. Gently pull the plastic tab and use tweezers to extract the SD card.

Next, insert the card into an SD card reader/adapter on your PC and you’re ready to get started.
A message Format Disk might appear on your screen. Please DON’T click on it, as this will delete all the information on your card.
Now you will see a new removable drive called resin-boot. Open it and copy the config.json file to a safe location.
2. Generate a key pair for SSH access.
The private key will remain on your PC and the public key will go to your gateway.
Open a new Command Prompt (cmd) by typing cmd in the search bar or file explorer and hitting Enter.
Type ssh-keygen and hit Enter.

You will be prompted to name your key. You can name it anything you like, but it’s a good idea to name it after the last few symbols of your gateway’s MAC address. For example, we will use KeyMBE as a key name.
You will also be asked to set a passphrase.
Please write down the key name and passphrase, as you will need them later.
3. Move the private key to a .ssh folder.
Once the public and private keys are generated, they
will be located in your default user folder (e.g. C:\Users\your username).
The path to the keys will also be shown in the Command Prompt (cmd).

They are named identically, but you can check the Type column to know the difference: File is for the private key and PUB File is for the public key. In our case, the PUB File for the public key is selected.
If you can’t see the keys, you may need to show the Hidden items as shown on the screenshot.
The private key will remain on your PC, but it must be moved to the .ssh folder located in the same directory.
If the .ssh folder does not exist, create a new one and put the key inside.
4. Copy the public key to the config file on the SD card.
Open the public key file using a text editor such as Notepad.

Copy and paste your public key in to the config file, right after the SSH keys, and put a comma and quotation marks between them (as shown on the screenshot).

Save the config file to complete the process.
5. Place the SD card back into the gateway.
Once the process is completed, insert the SD card back into your gateway and attach the antenna.
Then connect the gateway via Ethernet LAN cable to your local network and power it on.
Please wait a few minutes for the gateway to boot up and then return to your PC.
6. Convert your private key with PuTTYgen.
Follow this link to download PuTTY (an ssh and telent client) and install it.
Now you need to run PuTTYgen (a key generator tool for creating pairs of public and private SSH keys).
Go to Windows > Start menu > All programs > PuTTY > PuTTYgen > File > Load private key
Choose the private key from the .ssh folder. If you don’t find it, select All files in the bottom right corner.
Enter your Key passphrase, once prompted.
Go to Conversions > Open SSH key (the first option) and save it.

7. Download and run the Crankk Installer.
Follow this link to download the latest version of the Crankk Installer.
It will install the Crankk software required for your gateway to function as a PoNP node.
Install the application and start it from the shortcut on your desktop.
8. Connect via SSH Login.
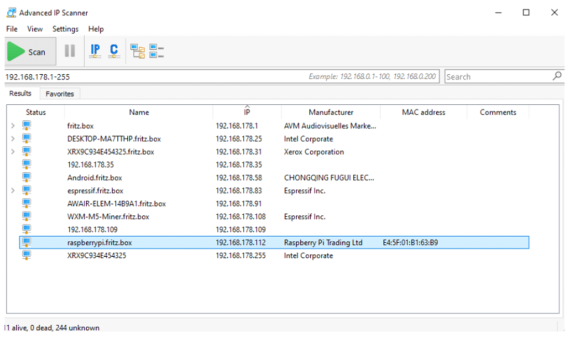
First check your router to find the gateway IP address.
If you are unsure how to do this, you can use free tools like Advanced IP Scanner to help you out. Check the MAC address of your gateway to find the correct IP address.

Select the Private Key option from the drop-down menu. Copy and paste your gateway IP address into the first field. Enter 22222 into the second field, this indicates the Port. Use the following credentials:
• Username: root
• Password: your Key passphrase (the one you previously set for your SSH key)
Open the converted private key (keym8eopenssh in this example) with Notepad and copy its full contents into the right blank field of the SSH Login window (as shown on the screenshot).
Hit the Connect button.

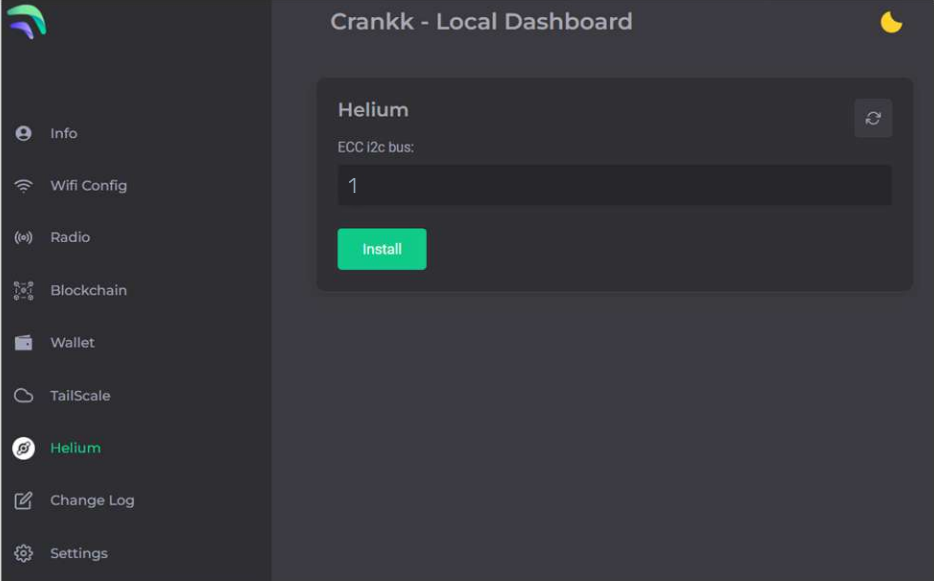
9. Install the Crankk software.
Once you are logged into the gateway, press the Install Crankk button and then restart the gateway.