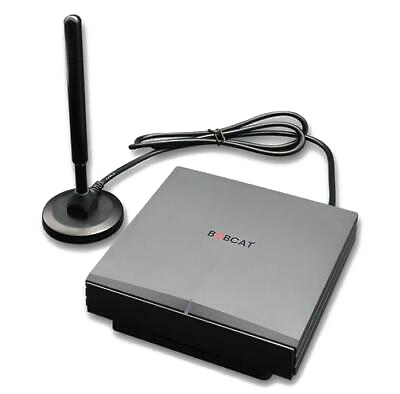
Crankk official guide for onboarding a Bobcat Miner 300 (G285 - RK3566 - 2GB) Gateway with an SD Card
![]()
Crankk official guide for onboarding a Bobcat Miner 300 G285 gateway using an SD Card
If you’re considering dual mining Helium, please remember that you need to onboard it with Helium first.
Additional information regarding the Bobcat models and the flashing process can be found Here.
Please take note of potential Bobcat design flaws and hardware challenges outlined at the bottom of the guide.
If your Bobcat is still running the original OS and you haven’t installed CrankkOS yet, make sure to use the boot fixer first.
If you are already running CrankkOS on the eMMC, you can proceed with flashing CrankkOS directly onto the SD card.
You need a new SD card. We recommend using at least
a 64GB SD card.
1. Download the CrankkOS image, Boot Fixer and balenaEtcher.
As Bobcat G285 is Rock chip you need to download the correct image for the SD card flashing:
CrankkOS image for Bobcat G285
You will also need the boot fixer, which should be flashed before the CrankkOS image to enable booting from the SD card:
And this one to download the balenaEtcher software, which
is needed to flash the boot fixer and the image to the SD card.
If you encounter an issue with the Bobcat G285 image, you can try flashing the G285m image instead.
This image was specifically designed for Bobcats stuck in Maskrom mode while using rkdevtools to flash the EMMC, but it may also help with other issues.
2. Insert your SD card into the SD card reader/adapter on your PC.
A message Format Disk might appear on your screen.
Please don’t skip this option or Format the SD card using other ways.
3. Install balenaEtcher and flash the SD card with the boot fixer first.
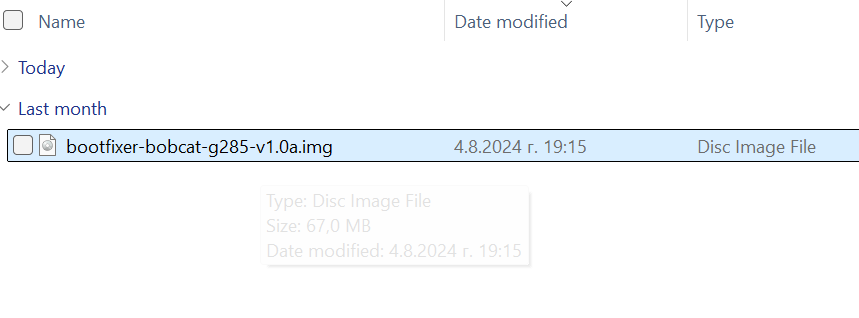
First unzip/extract the Boot fixer file until you get the image file as on the screenshot:
Install and open balenaEtcher.
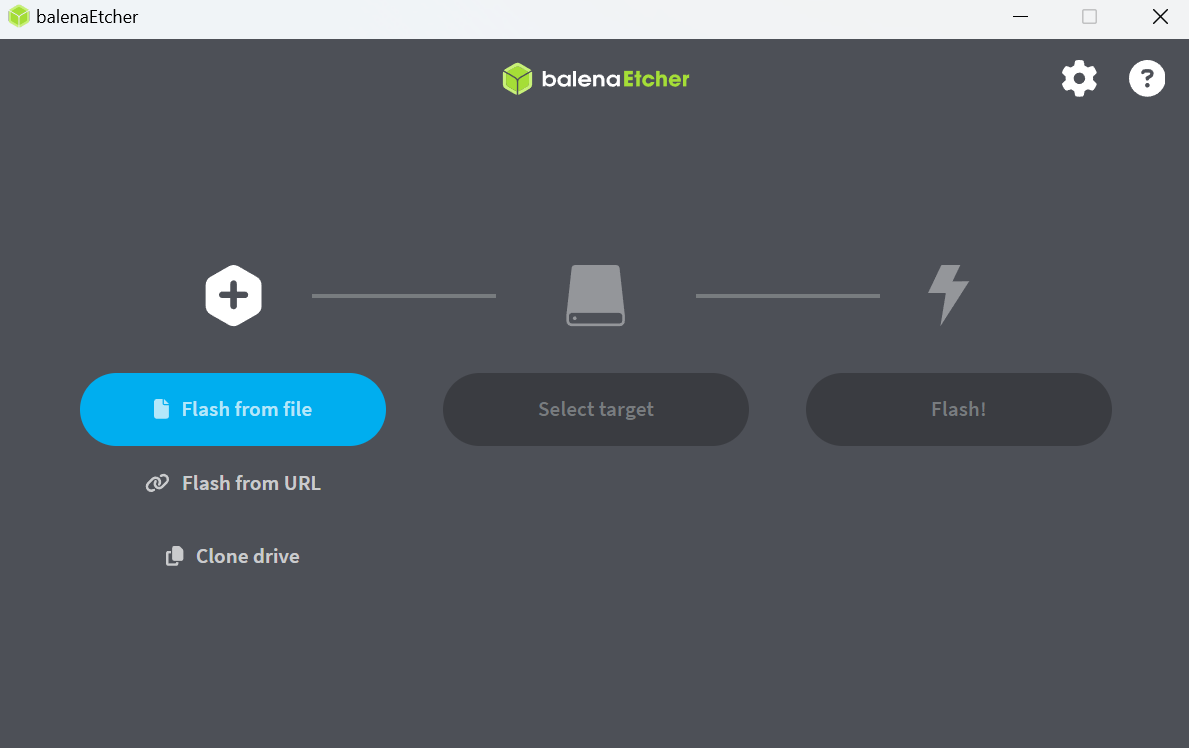
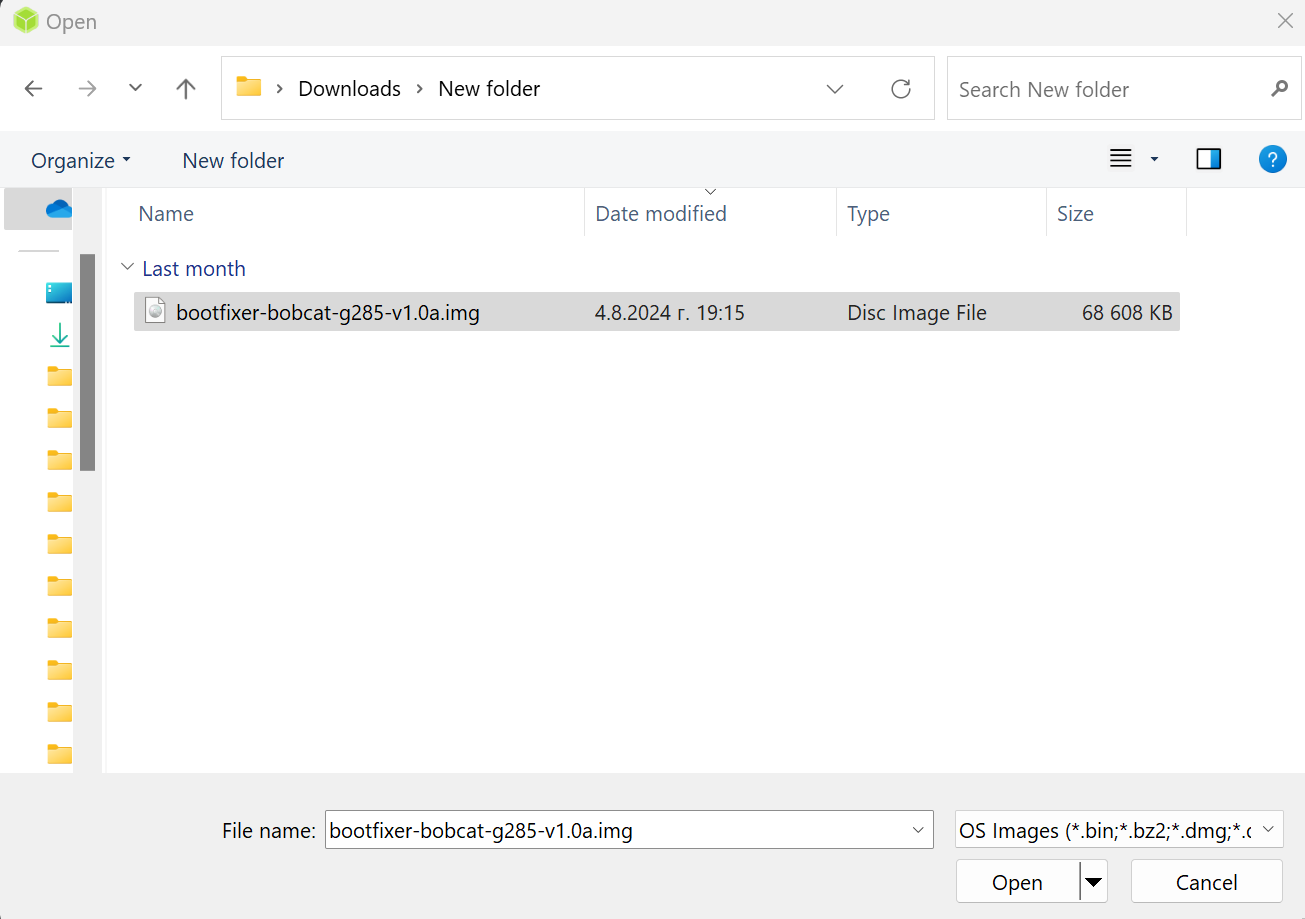
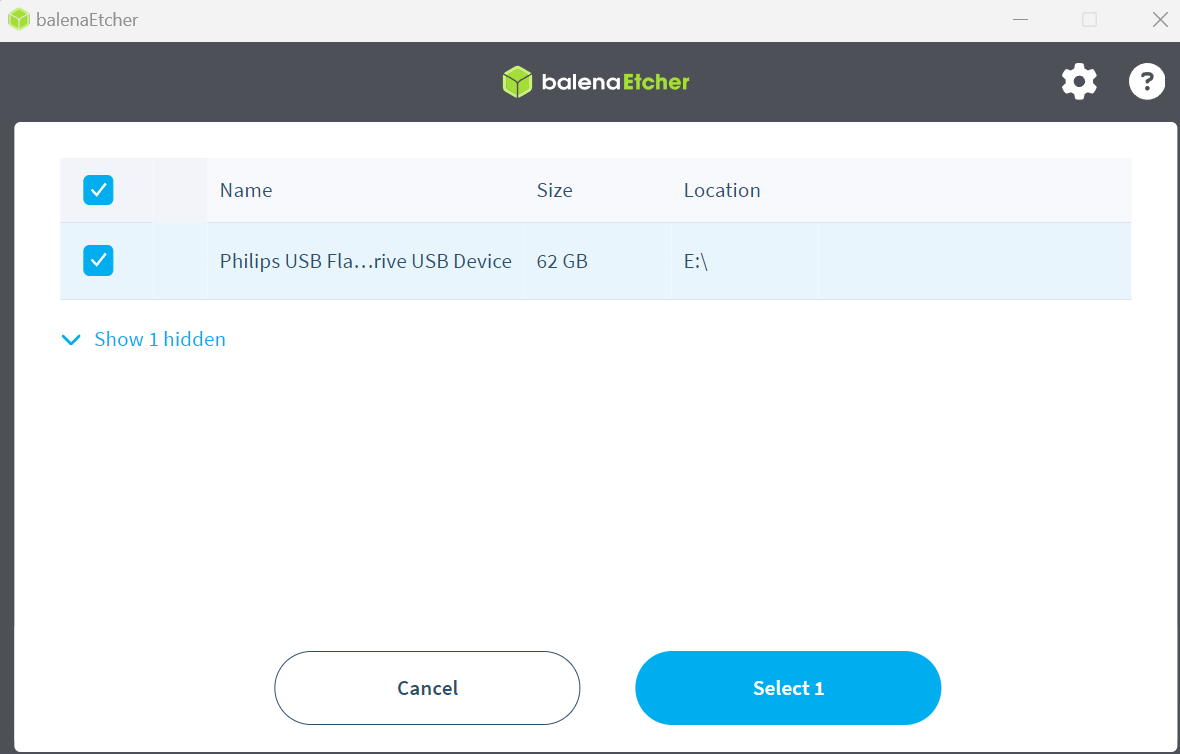
Use the Flash from file option and select the Boot fixer file you have downloaded.
Okay, next pick your SD card > Select > Flash
The flashing process can vary, but usually takes up to 10 minutes.
Once its done, place the SD card back to your Bobcat gateway and power it on.
We tried to make it easy for you to know when a fixer succeeds by making the LED(s) blink indefinitely at the end of the process.
Unfortunately, on some platforms, this doesn’t work and you’ll have to try it by attempting to boot CrankkOS.
4. Flash the CrankkOS to the SD card.
After applying the boot fixer to your gateway, the final step is to flash the CrankkOS image onto the SD card.
To do this, repeat Step 3, but this time select the extracted CrankkOS image you downloaded earlier.
After writing the image to the SD card, you may need to adjust the partition table to expand the partitions and utilize the full capacity of the SD card.
5. Place the SD card back into the gateway .
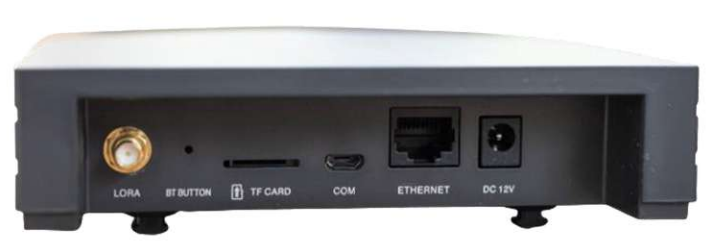
Once the process is completed, insert the SD card back into your gateway and attach the antenna.
Then connect the gateway via an Ethernet LAN cable to your local network and power it on.
Please wait a few minutes for the gateway to boot up and then return to your PC.

2) Local Dashboard setup
5. Log in to the Local Dashboard.
If you have any VPN enabled on your PC, please turn it off.
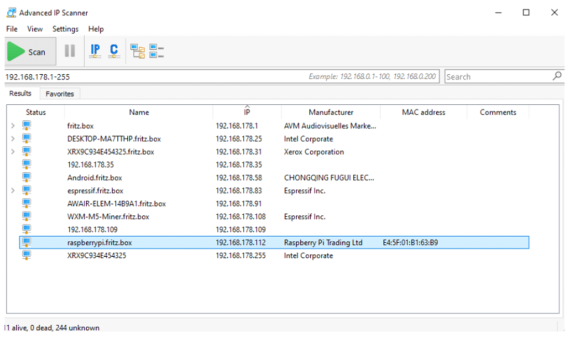
Now check your router to find the gateway IP address.
If you are unsure how to do this, you can use free tools like Advanced IP Scanner to help you out. Check the MAC address of your gateway to find the correct IP address.
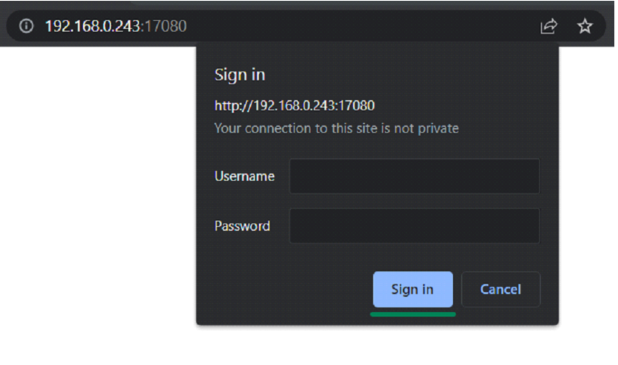
Once you have the LAN IP address of your gateway, open
a new browser tab from a PC on the same network and paste the IP followed by :17080
http://192.168.0.243:17080
When logging in for the first time, you do not need to enter any credentials, just press Sign in.
You will be prompted to change your Dashboard password.
Please do so in the Settings tab.
6. Set up the gateway.
Go to the Info tab > Setup Gateway
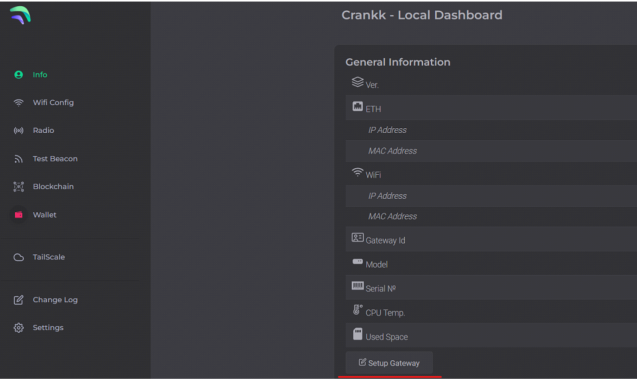
Copy your Gateway ID, as we will need it later.
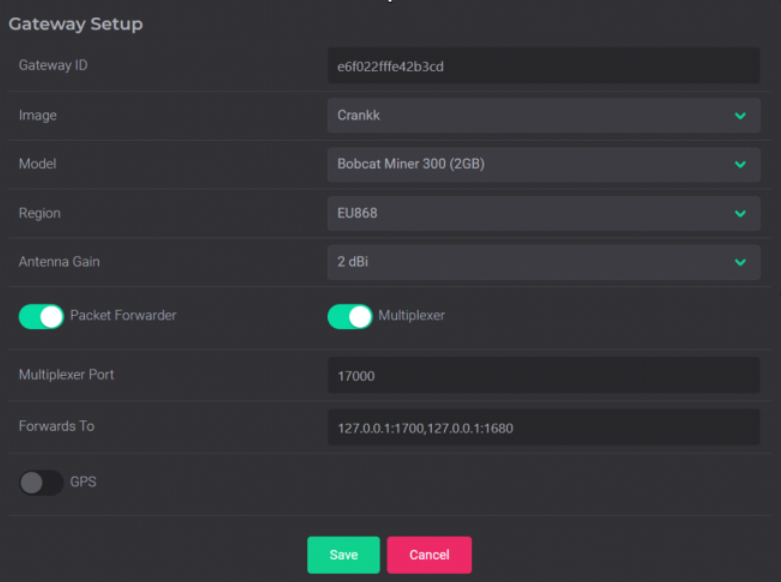
Select the Image that is installed on your gateway (Crankk / Helium / Nebra), Model and Region* (EU868 / AU915 / US915).
For Bobcat Miner gateways, only the Crankk image is available at the moment.
Turn on the Packet Forwarder.
If you are currently mining or planning to mine Helium, leave the Forwards to box unchanged as shown in the screenshot.
If you don’t wish to mine Helium, leave only 127.0.0.1:1700
Hit Save.
Your gateway will restart automatically. Please wait a few minutes while it loads.
7. Double mining.
If you want to participate in Double mining, you can install Helium from here:
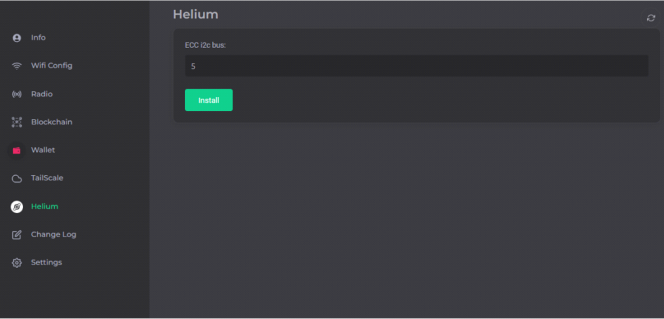
If the I2C bus 5 does not work in your case, try reinstalling Helium using 2.
8. Import your secret key.
Hint: If you don’t have your secret key saved, you can go to the User Dashboard >Wallets> find the correct wallet> use the three dots to reveal the secret key.
Navigate to the Wallet section in the Local Dashboard and enter your secret key, keeping the following in mind:
• Please ensure that you copy and paste the secret key exactly as it is, without any spaces or other symbols
• Please double-check that it is the correct secret key and that it does not belong to another gateway
• Please also note that your secret key is different from your wallet address/public key starting with k:
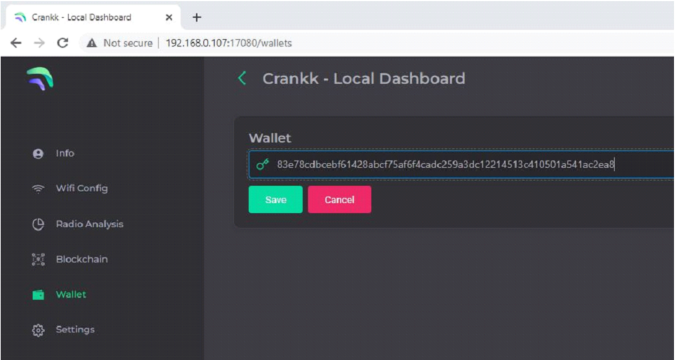
Hit Save.
If you have entered the correct secret key, then you will see your k: wallet address displayed in the Wallet field.
Please note that re-flashing already on boarded Bobcat G290/G295 with the CrankkOS image will result in creating a new MAC address and new gateway ID.
We advise against reinstalling the image. However, if you must do so, please use your old gateway ID (which can be found in the User Dashboard) when setting it up and contact the Crankk Technical Support team to reset the connection to the ChirpStack server if needed.
3) User Dashboard setup
9. Assign your gateway ID to a wallet in the User Dashboard.
Visit https://dashboard.crankk.io and sign in into your account.
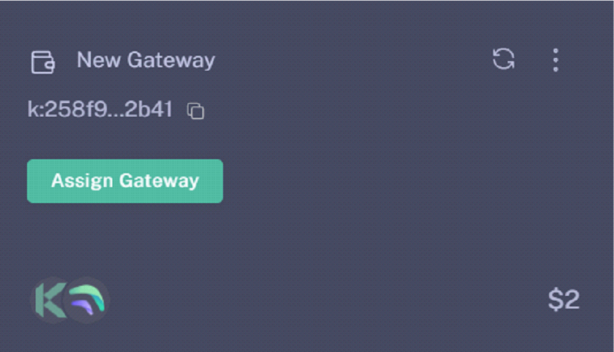
Navigate to the Wallets section and select the wallet that you want to use for your software license activation. Please note that a positive KDA balance in your wallet is required for the successful assignment of the gateway.
Assign your gateway ID to the chosen wallet by clicking on the Assign button. If you don’t see such a button, it means you haven’t purchased a software license for this wallet.
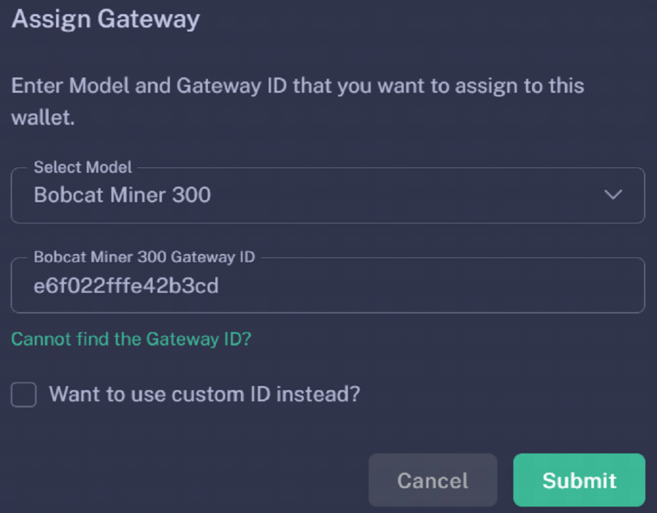
Select your gateway Model, copy and paste your Gateway ID (please double-check that it is correct) and hit the Submit button.
Please wait a few minutes to allow the changes to sync to the blockchain.
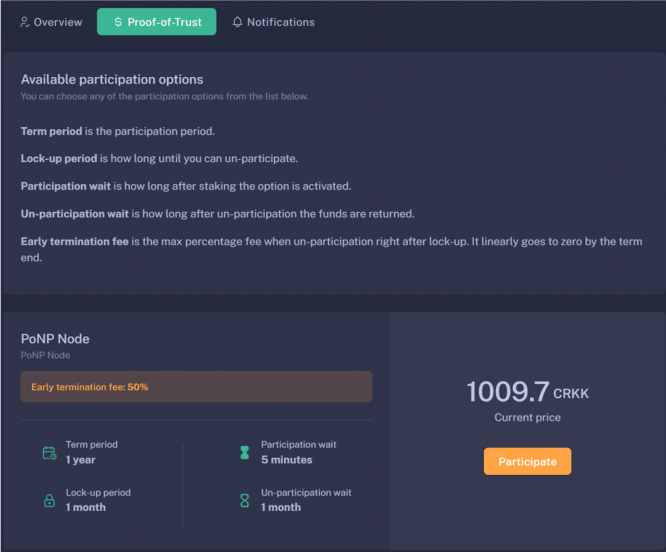
10. Participate in Proof-of-Trust as PoNP node
Network Participation is a mandatory requirement for all gateways onboarded into Crankk, in order to receive rewards. It requires staking $100 worth of CRKK tokens.
Those funds remain yours, and if you decide to discontinue participation, you can fully withdraw them after a period of one year.
If you don’t have those tokens, just transfer an equal amount of KDA coins to your wallet. Then, use the dashboard’s DEX to swap them for CRKK tokens. After swapping, make sure there’s enough KDA in your wallet left to cover transaction fees.
Be cautious, especially if it’s your first time using a DEX. A recommended approach is to begin trading with small amounts.
To complete this process:
⦁ Log in to the User Dashboard.
⦁ Navigate to Gateways and select your specific gateway.
⦁ Click on Proof-of-Trust.
⦁ Next to the “Network Participation” tab, you will find the current amount of CRKK tokens required for staking. Simply press the green Participate button.
It’s important to note that the staking value remains constant at $100. The only variable is the quantity of CRKK tokens that need to be staked. If you lack the necessary tokens for staking, our DEX offers the option to exchange KDA coins for CRKK tokens.
11. Set your gateway location
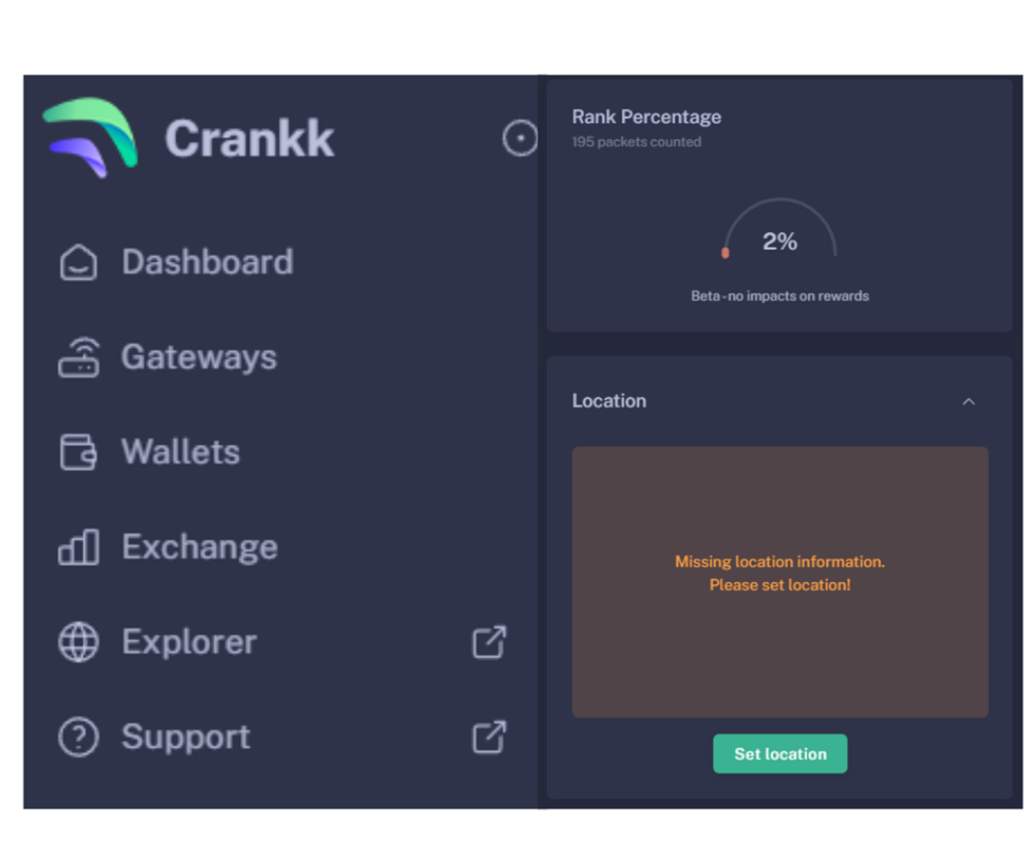
To set your gateway location you need to:
⦁ Navigate to your gateway in the User Dashboard.
⦁ Scroll down below the Rank Percentage section until you find the Location tab.
⦁ Unlock your wallet by entering the correct password.
⦁ Click on Set Location.
⦁ Zoom out using the scroll wheel on your mouse.
⦁ Select the desired gateway location.
⦁ Click Submit.
Congratulations! You have successfully onboarded your Bobcat Miner gateway on Crankk!
Troubleshooting options:
Warning: If a boot fixer succeeds, it will prevent the original OS from booting. There’s no (easy) way to go back.
If a boot fixer fails, it won’t break or harm your device in any way. You can try as many fixer variants as you want until one succeeds.
We tried to make it easy for you to know when a fixer succeeds by making the LED(s) blink indefinitely at the end of the process. Unfortunately, on some platforms, this doesn’t work and you’ll have to try it by attempting to boot CrankkOS.
These fixers only work if the device runs its original, stock OS.
Keep running CrankkOS from SD card or transfer to eMMC? Once you have “fixed” your boot loader, your original OS won’t boot anymore so there’s no point in keeping it. eMMC is usually faster and more reliable than an SD card, so ideally you should transfer to eMMC and ditch the SD card.
There is a known problem with this device model where some units simply won’t accept the bootloader downloading command during flashing operations, therefore remaining stuck in the so-called Maskrom mode. The root cause is still unknown and we’re not aware of a permanent fix either. However, we’ve got a workaround: we maintain a dedicated platform OS build called bobcat-g285m that boots on these devices, but only from SD card.
This disclaimer highlights potential hardware issues with certain Bobcat units.
While most units function properly, some may experience hardware problems, possibly arising after attempts to debug or flash. We attribute these issues to potential design flaws and the use of inexpensive components. Notably, three recurring problems have been observed:
- Degradation of Serial Port: The serial port used for debugging in G285 and G295 models deteriorates over time, leading to increased error rates and displaying unintelligible data. While it may not impact overall functionality, it signals a gradual deterioration of hardware components.
- “Maskrom” Mode: G285 units may get stuck in “maskrom” mode, indicating a failure to boot the CPU, likely due to communication issues with RAM or other peripherals. Despite the USB chip still functioning, the device becomes unresponsive. This suggests that, in theory, bricking a Rockchip device only through software means should be impossible.
- SD Card Booting Issues in G280 Units: Some G280 units encounter problems booting from SD cards. Initially suspected to be firmware-related, it was later discovered that the order of eMMC and SD card is swapped in some units, causing bootloader failure. This issue is exacerbated by slow and buggy SD card access, making successful booting difficult. Attempts to boot from SD cards result in kernel hangs during resource-intensive operations. Despite trying various SD card models, the problem persists, suggesting a fundamental issue in these units’ ability to boot from SD cards.
- If you want to go back to the original OS, then you need to have it as a backup and flash it again. Crankk is not responsible for providing a backup.
* Crankk currently supports the following frequencies: EU868 MHz, AU915 MHz and US915 MHz. It is essential to ensure that any hardware purchased from a third-party company for use with Crankk operates on the correct frequency for your region of residence. Crankk Inc. assumes no responsibility for any issues arising from the use of hardware with an incorrect frequency. It is the responsibility of the user to select the appropriate frequency for their region of residence.
Please note that any modifications, updates or restrictions made by the gateway manufacturer that may impact the performance or functionality of the gateway on the Crankk network are beyond the control and responsibility of Crankk Inc. Users are advised to check compatibility and seek assistance from the gateway manufacturer for any gateway-related issues.