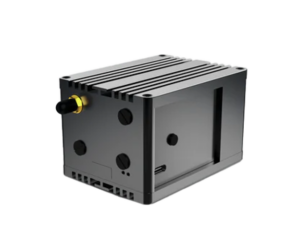
Crankk official guide for onboarding a WisGate / Rak V1.5 Gateway
Crankk official guide for onboarding a RAK v1.5 Wisgate by RAKwireless gateway
We have automated the onboarding process of RAK v1.5 Wisgate gateways to just a few steps.
You can check both sides of the gateway for RAK v1.5 markings.
If you’re considering dual mining Helium, please remember that you need to onboard it with Helium first.
Here are a few things you might need for this guide: tweezers and an SD card reader/adapter:

the image. We recommend using at least a 64GB SD card.
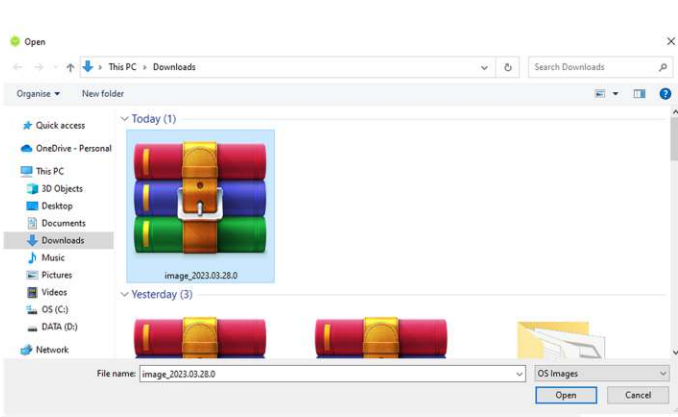
1. Download the Crankk image and balenaEtcher.Follow this link to download the official Crankk IMG.
And this one to download the balenaEtcher software, which is needed to flash the image to the SD card.
While you wait for the downloads to complete, head over to your RAK v1.5 Wisgate gateway.
2. Remove the SD card from your RAK v1.5 Wisgate gateway and insert it into an SD card reader/adapter on your PC.
To begin, gently remove the plastic tab and use tweezers to extract the SD card.
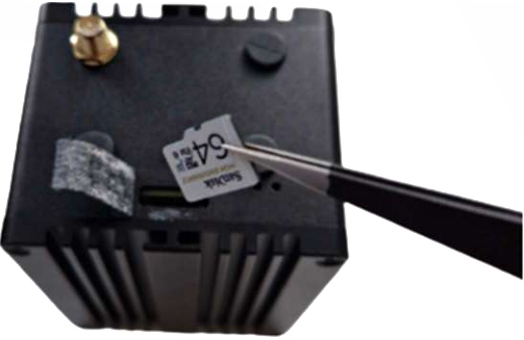
Next, insert the card into an SD card reader/adapter on your PC and you’re ready to get started.
A message Format Disk might appear on your screen. You don’t need to format the card, as the balenaEtcher will take care of it.
You can copy the config file from the SD card and keep it as a backup.
3. Install balenaEtcher and flash the SD card.

Use the option Flash from file and select the Crankk image file you have downloaded. It is not
necessary to unzip the file, simply select it as is.
Okay, next pick your SD card >Select> Flash
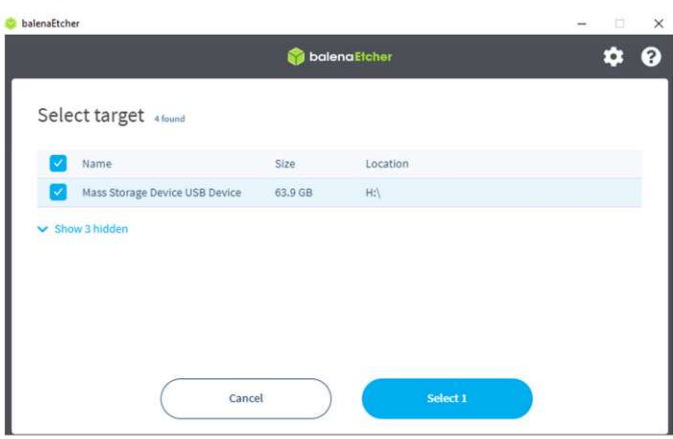
The flashing process can vary, but usually takes about
20-30 minutes.
4. Place the SD card back into the gateway.
Once the process is completed, insert the SD card back into your gateway and attach the antenna.
Then connect the gateway via an Ethernet LAN cable to your local network and power it on.
Please wait a few minutes for the gateway to boot up and then return to your PC.

2) Local Dashboard setup
5. Log in to the Local Dashboard.
If you have any VPN enabled on your PC, please turn it off.
Now check your router to find the gateway IP address.
If you are unsure how to do this, you can use free tools like Advanced IP Scanner to help you out. Check the MAC address of your gateway to find the correct IP address.
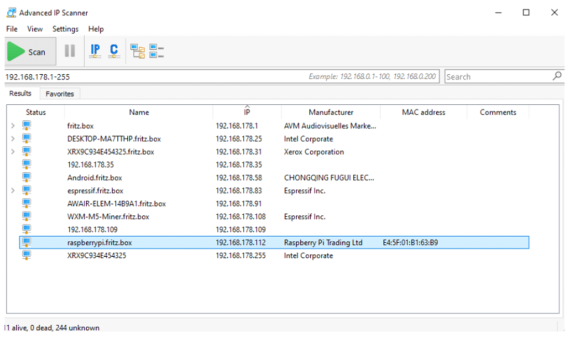
Once you have the LAN IP address of your gateway, open
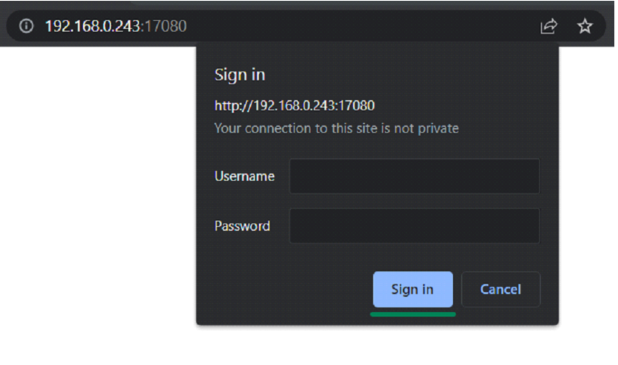
a new browser tab from a PC on the same network and paste the IP followed by :17080
http://192.168.0.243:17080
When logging in for the first time, you do not need to enter any credentials, just press Sign in.
You will be prompted to change your Dashboard password.
Please do so in the Settings tab.
6. Set up the gateway.
Go to the Info tab > Setup Gateway
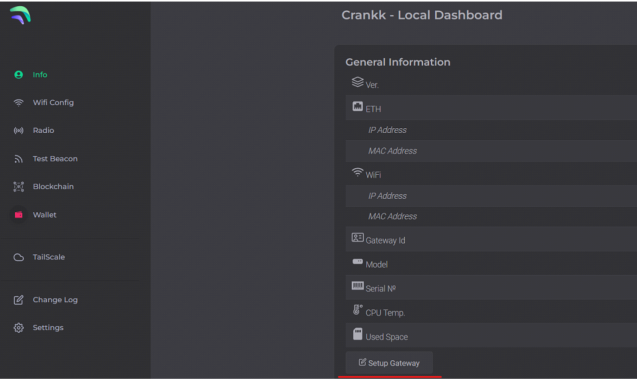

Copy your Gateway ID, as we will need it later.
Select the Image that is installed on your gateway (Crankk / Helium / Nebra), Model and Region* (EU868 / AU915 / US915).
Turn on the Packet Forwarder.
If you are currently mining or planning to mine Helium, leave the Forwards to box unchanged as shown in the screenshot.
If you don’t wish to mine Helium, leave only 127.0.0.1:1700
Hit Save.
Your gateway will restart automatically. Please wait a few minutes while it loads.
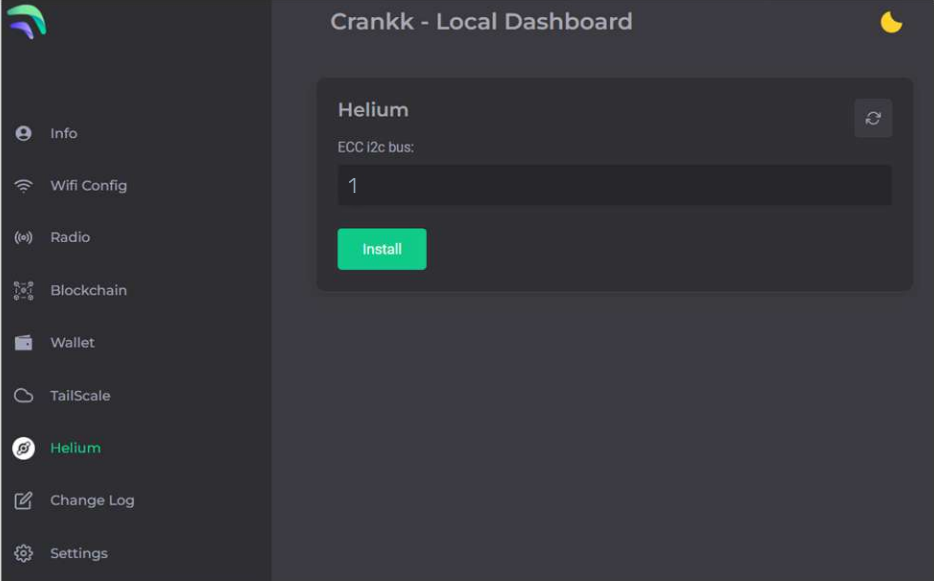
7. Double mining.
If you want to participate in Double mining, you can install Helium from here:
8. Import your secret key.
Hint: If you don’t have your secret key saved, you can go to the User Dashboard >Wallets> find the correct wallet> use the three dots to reveal the secret key.
Navigate to the Wallet section in the Local Dashboard and enter your secret key, keeping the following in mind:
• Please ensure that you copy and paste the secret key exactly as it is, without any spaces or other symbols
• Please double-check that it is the correct secret key and that it does not belong to another gateway
• Please also note that your secret key is different from your wallet address/public key starting with k:
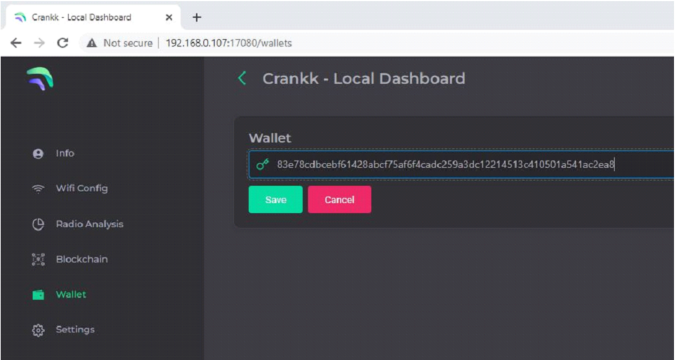
Hit Save.
If you have entered the correct secret key, then you will see your k: wallet address displayed in the Wallet field.
3) User Dashboard setup
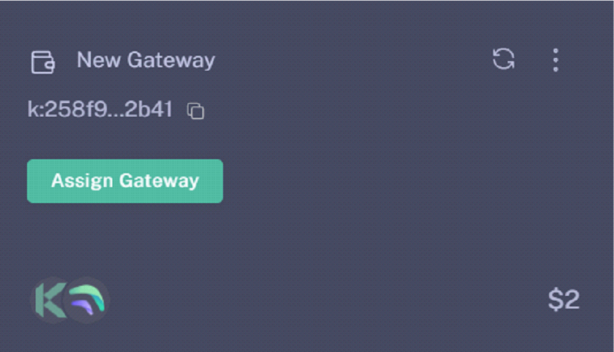
9. Assign your gateway ID to a wallet in the User Dashboard.
Visit https://dashboard.crankk.io and sign in into your account.
Navigate to the Wallets section and select the wallet that you want to use for your software license activation. Please note that a positive KDA balance in your wallet is required for the successful assignment of the gateway.
Assign your gateway ID to the chosen wallet by clicking on the Assign button. If you don’t see such a button, it means you haven’t purchased a software license for this wallet.
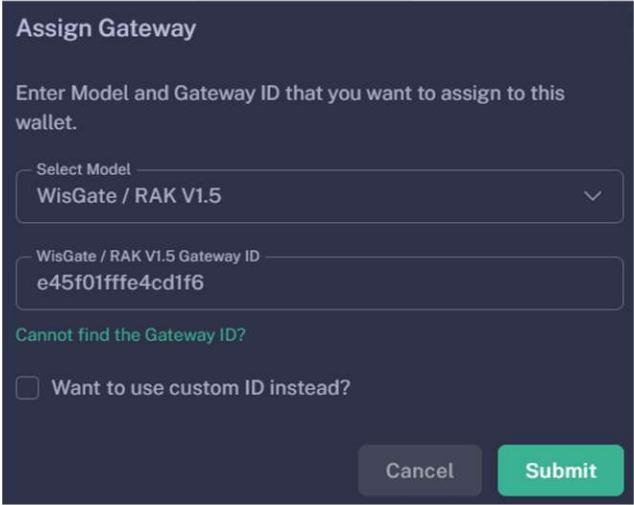
Select your gateway Model, copy and paste your Gateway ID (please double-check that it is correct) and hit the Submit button.
Please wait a few minutes to allow the changes to sync to the blockchain.
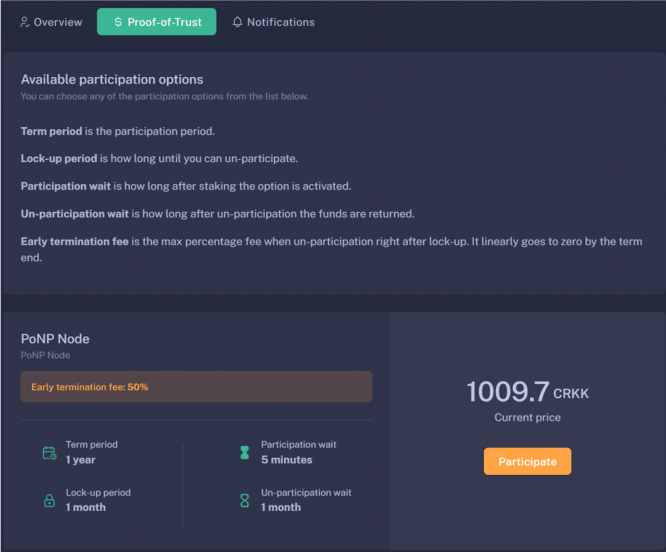
10. Participate in Proof-of-Trust as PoNP node
Network Participation is a mandatory requirement for all gateways onboarded into Crankk, in order to receive rewards. It requires staking $100 worth of CRKK tokens.
Those funds remain yours, and if you decide to discontinue participation, you can fully withdraw them after a period of one year.
If you don’t have those tokens, just transfer an equal amount of KDA coins to your wallet. Then, use the dashboard’s DEX to swap them for CRKK tokens. After swapping, make sure there’s enough KDA in your wallet left to cover transaction fees.
Be cautious, especially if it’s your first time using a DEX. A recommended approach is to begin trading with small amounts.
To complete this process:
⦁ Log in to the User Dashboard.
⦁ Navigate to Gateways and select your specific gateway.
⦁ Click on Proof-of-Trust.
⦁ Next to the “Network Participation” tab, you will find the current amount of CRKK tokens required for staking. Simply press the green Participate button.
It’s important to note that the staking value remains constant at $100. The only variable is the quantity of CRKK tokens that need to be staked. If you lack the necessary tokens for staking, our DEX offers the option to exchange KDA coins for CRKK tokens.
11. Set your gateway location
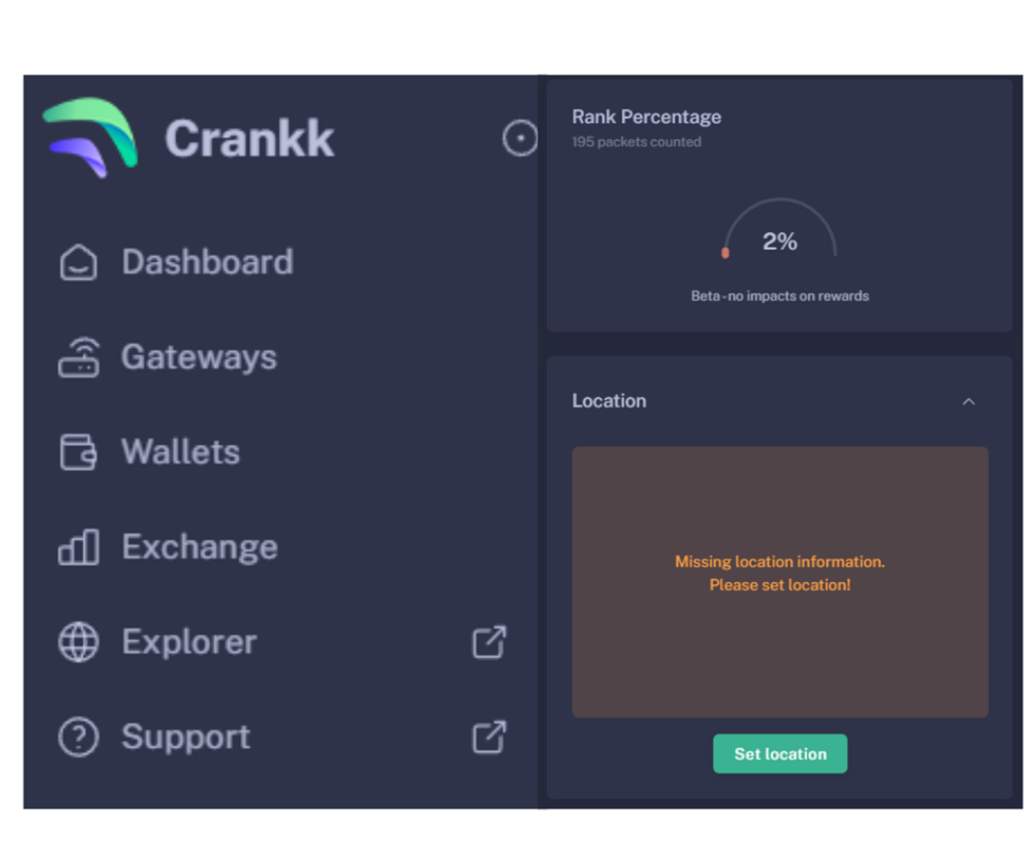
To set your gateway location you need to:
⦁ Navigate to your gateway in the User Dashboard.
⦁ Scroll down below the Rank Percentage section until you find the Location tab.
⦁ Unlock your wallet by entering the correct password.
⦁ Click on Set Location.
⦁ Zoom out using the scroll wheel on your mouse.
⦁ Select the desired gateway location.
⦁ Click Submit.
Congratulations! You have successfully onboarded your WisGate / Rak V1.5 Gateway gateway on Crankk!
* Crankk currently supports the following frequencies: EU868 MHz, AU915 MHz and US915 MHz. It is essential to ensure that any hardware purchased from a third-party company for use with Crankk operates on the correct frequency for your region of residence. Crankk Inc. assumes no responsibility for any issues arising from the use of hardware with an incorrect frequency. It is the responsibility of the user to select the appropriate frequency for their region of residence.
Please note that any modifications, updates or restrictions made by the gateway manufacturer that may impact the performance or functionality of the gateway on the Crankk network are beyond the control and responsibility of Crankk Inc. Users are advised to check compatibility and seek assistance from the gateway manufacturer for any gateway-related issues.